 Models
 Materials
 HDRIs
HDRIs
 Scenes
 Brushes
 Node Groups
 Printables
 Creators
 Creations
N-Gone Pro 1.5.1
 add-on
N-gone Asset Optimizer
N-GONE PRO 2.0
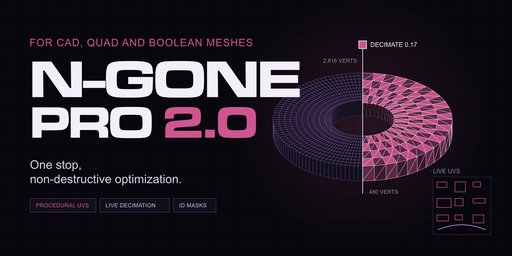
CAD, QUAD, BOOLEAN. BROKEN?
Not any more. N-Gone Pro optimises n-gon and quad meshes in Blender, and it's built for the models that are hardest to clean up: CAD imports, Plasticity exports and Boolean-heavy hard surface work. Set a polygon density, watch the mesh update live, and get UVs that regenerate with it. Around that core are the tools for the rest of the pre-export stage, so hours of prep become minutes.
POLY COUNT AND UVS ARE ONE TASK NOW
Select any number of objects and press Make Low Poly. N-Gone Pro moves them into a Prep collection, adds a _prep suffix and builds a modifier stack on each one: triangulate, decimate, and a data transfer that carries your original face normals across. A copy of every original is kept in a collapsed DATA collection, so your custom normals are never lost. Make High Poly does the same for your bake sources with a _high suffix. When you're happy with the result, Push All to Low creates your final low poly collection.
DIAL IN THE DETAIL, KEEP WHAT MATTERS
Set Detail in the N-panel, or press D in the viewport and drag. Paste Detail copies the active object's setting to everything selected. In Edit Mode, select faces and press Retain Details to protect them from reduction, so the areas that need their shape keep it.
PROCEDURAL UVS THAT FOLLOW THE MESH
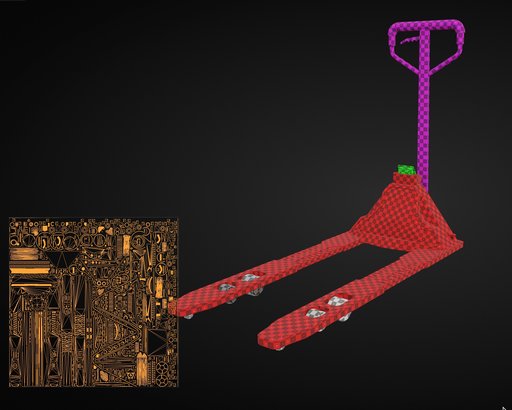
New in 2.0, N-Gone Pro UVs is a Geometry Nodes unwrap that sits after the Decimate modifier and recalculates whenever the mesh changes. It cuts seams by edge angle, and can also use your marked UV seams (useful on round and cylindrical parts) and sharp edges (which Plasticity exports already carry). Choose the island margin and packing method, then pack to one UV map, one per object or one per material. It's also in the modifier menu under N-Gone Pro, so you can use it outside the N-Gone workflow, even while you model, and skip the unwrap step entirely.
The N-Gone Pro material shows a UV checker and tints each part with its own colour, so you can read the unwrap and the part breakdown at a glance. Material IDs can be assigned per object or per name prefix.
EVERY STAT IN THE VIEWPORT
Live overlays put everything in the 3D viewport, with no switching workspaces: UV island count, UV space used, a live UV preview, the object in context, visible collections, average decimation across the Prep collection and the vertex reduction for your selection. They also flag changes that haven't been pushed to low yet.
NAMES THAT BAKE FIRST TIME
Match Names pairs your low and high poly meshes and gives each the right suffix in one click, ready for Substance Painter and Marmoset Toolbag. Bulk Rename, Rename Low, Rename High, Remove Suffix and Text to Remove (for stray .001 endings) cover everything else.
VERTEX COLOUR MASKS WITHOUT THE FIDDLING
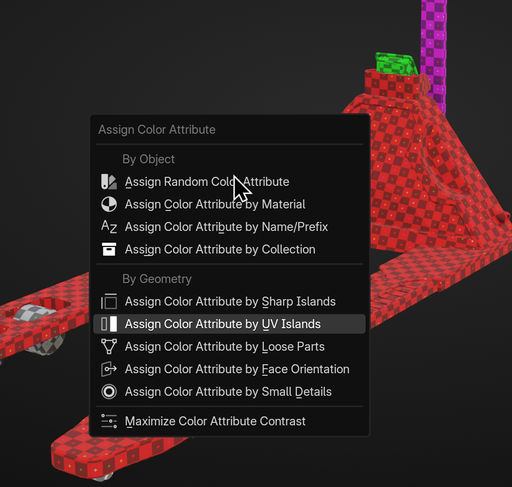
Assign vertex colours across objects and faces in one pass, with every option tunable in the redo panel. Assign by Small Details finds dense clusters such as screws, so they can be masked away from painted surfaces. Maximize Color Contrast spreads the colours apart so masks don't bleed in your texturing app. The menu is on Alt+V, in the N-panel and in F3, and every shortcut can be changed in Preferences.
THE WORKFLOW
1. Select your low poly meshes and press Make Low Poly.
2. Select your high poly meshes and press Make High Poly.
3. Refine in the Prep collection: set Detail, retain what matters and turn on N-Gone Pro UVs.
4. Press Match Names, then Push All to Low.
5. Assign vertex colour masks and export to your baker.
REQUIREMENTS
Blender 4.2 LTS to 5.2. Installs as a Blender extension.
N-Gone Pro UVs needs a material on each object and the viewport in Material Preview or Rendered mode. N-Gone Pro prompts you if either is missing.
DOCUMENTATION
Full docs, with a page for every panel: https://takes-organization-1.gitbook.io/n-gone-pro/
Made by Take Refuge 3D.


