 Models
 Materials
 HDRIs
 Scenes
 Brushes
 Node Groups
 Printables
 Creators
 Creations
Texture Baker Light
 add-on
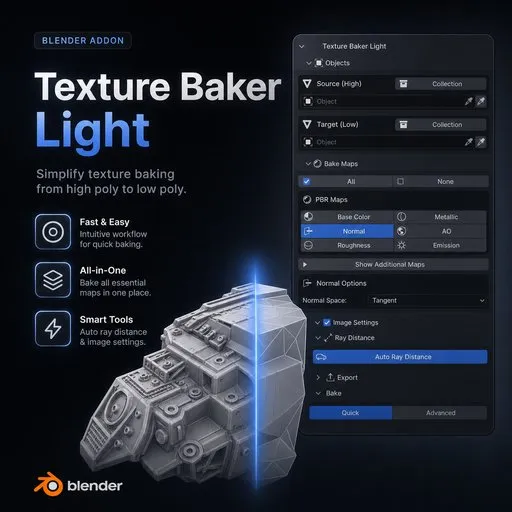
Texture Baker Light for Blender: one-click texture baking. Multi-map, batch baking, scene validation, auto Ray Distance, auto export, multilingual UI. Blender 4.1+
Texture Baker Light
Baking textures in Blender means manually switching bake types, creating images, guessing Ray Distance values, and dealing with overlapping nodes in the Shader Editor. Texture Baker Light eliminates all of that.
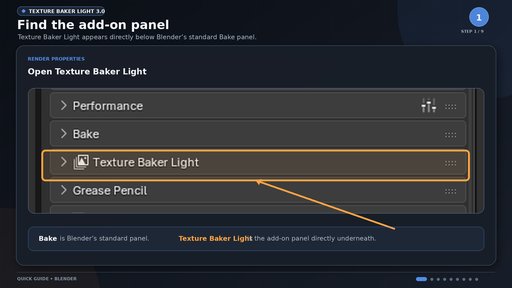
Two baking workflows
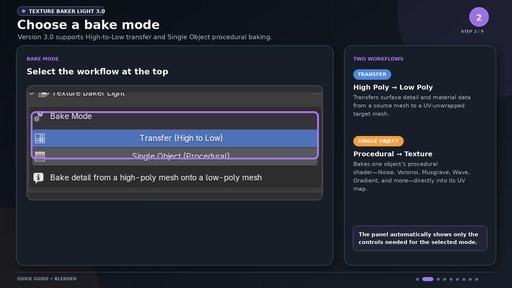
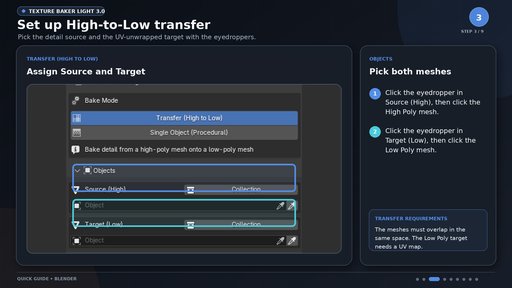
Transfer (High to Low) is the classic selected-to-active workflow. Pick the High Poly source and the UV-unwrapped Low Poly target with the eyedroppers, choose the required maps, and start the bake.
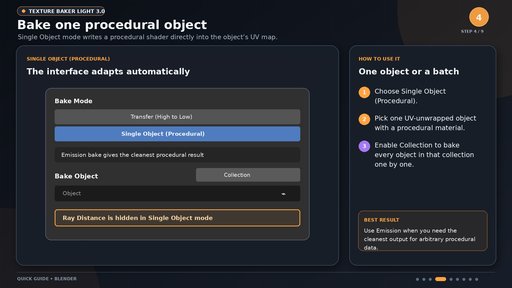
Single Object (Procedural) converts one object’s procedural material into texture maps. Select a UV-unwrapped object using Noise, Voronoi, Musgrave, Wave, Gradient, Bump, Normal Map, or other shader nodes. The add-on disables selected-to-active and cage automatically, hides Ray Distance, and bakes the shader directly into the object’s UV layout.
For arbitrary procedural data, Emission usually gives the cleanest result. Single Object mode can bake Base Color, Roughness, Normal, Emission, Metallic, AO, and Combined maps.
Batch bakingSwitch the Bake Object input to Collection to process every object in a collection. Each object is baked one after another and receives its own texture set.
Multiple maps in one run
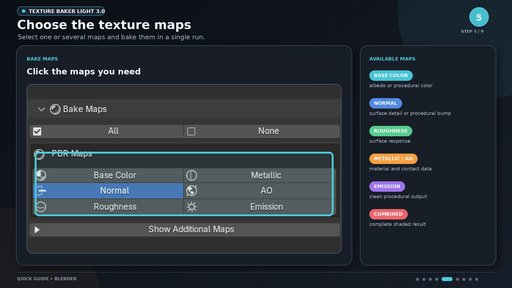
Select Base Color, Normal, Roughness, Metallic, AO, Emission, Combined, or additional maps. Texture Baker Light processes every selected map without requiring you to rebuild the Blender bake setup between passes.
Smart validation and one-click fixes
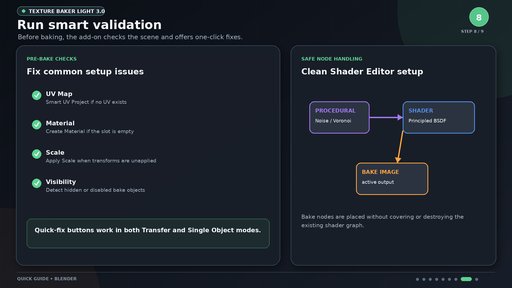
Before baking, the add-on checks UV maps, materials, scale, object visibility, and other common setup problems. Missing UVs can be fixed with Smart UV Project, an empty material slot can be filled with Create Material, and unapplied transforms can be corrected with Apply Scale. Quick-fix tools work in both Transfer and Single Object modes.
Automatic Ray Distance
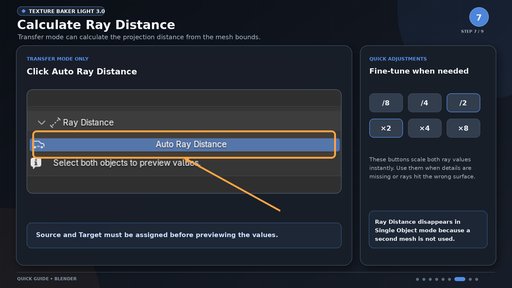
In Transfer mode, Ray Distance is calculated from the bounds of the High and Low Poly meshes. If the result needs adjustment, the /8, /4, /2, ×2, ×4, and ×8 buttons scale both values instantly. Ray Distance is hidden in Single Object mode because no second mesh is required
Clean nodes and automatic export
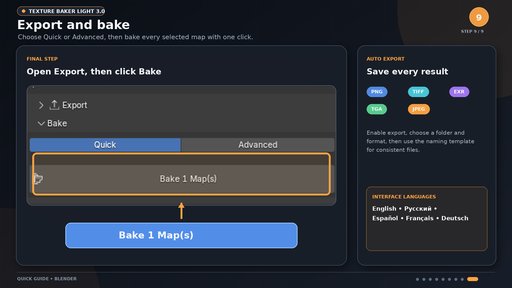
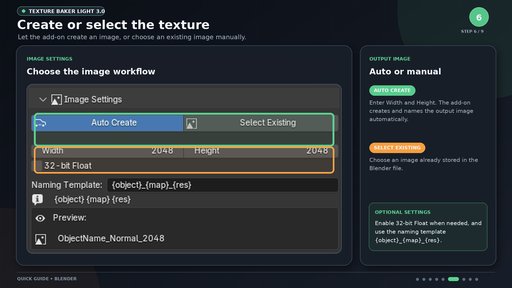
Bake nodes are added without covering the existing Shader Editor graph. Enable Auto Export to save every baked texture to a chosen folder in PNG, TIFF, EXR, TGA, or JPEG format using a template such as {object}{map}{res}.
The interface is available in English, Russian, Chinese, Japanese, Spanish, French, and German.
Important setup notesFor Transfer mode, the High and Low Poly meshes must occupy the same space, and the Low Poly target must have a UV map. For Single Object mode, only one UV-unwrapped object with a material is required.